DIY Soft Plastic Bait Injectors
February 29, 2020

DIY Soft Plastic Bait Injectors
These are a couple of Injectors I made for making soft plastic baits. Injectors can be purchased at several places online but I like to make anything I can (not to save money but for fun) so I did.
The build of the injector was part of the Tube Bait Mold Video but the Injector part can be seen HERE.
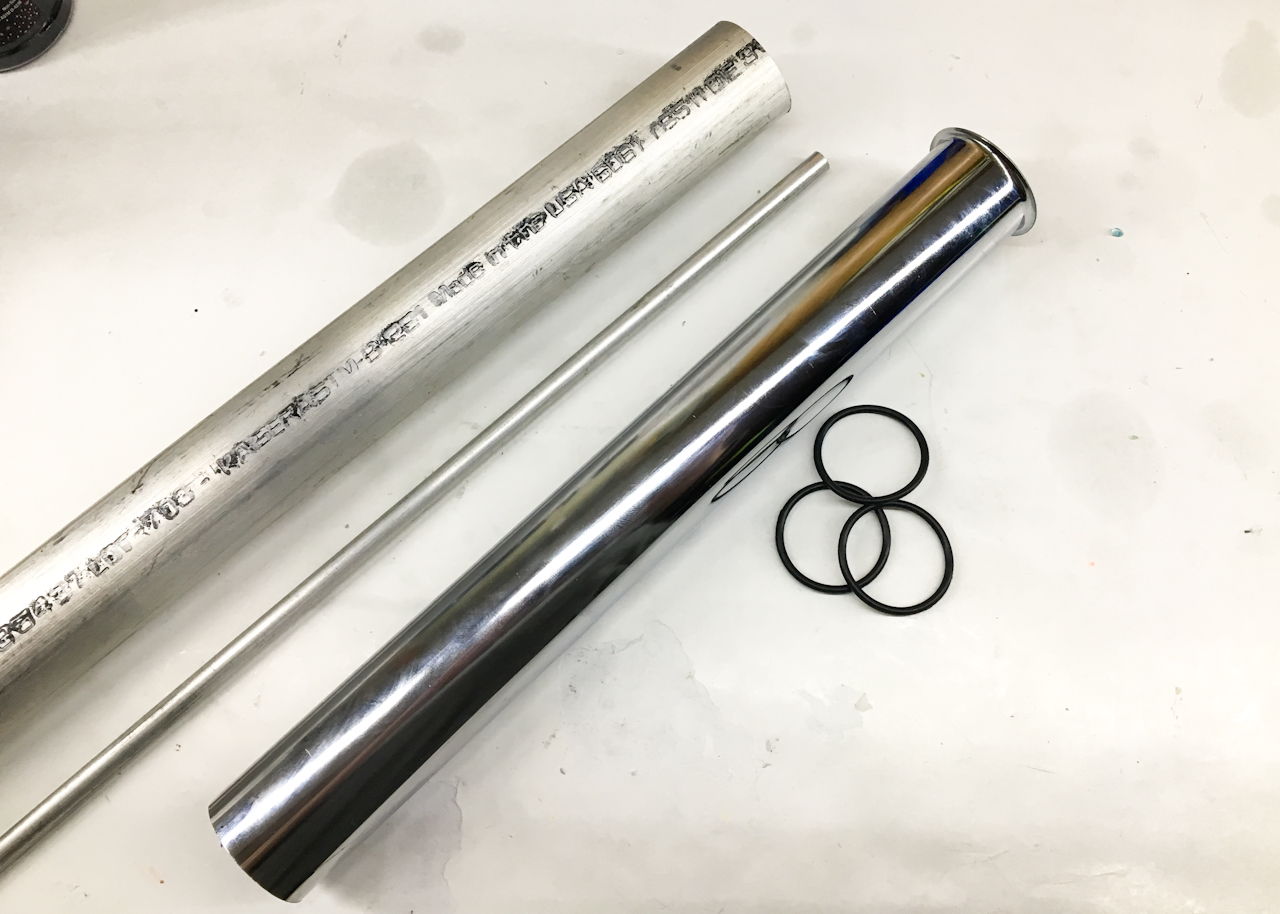
The first injector was made from a piece of kitchen downspout pipe, some aluminum bar stock, a few o-rings, as well as a printed handle (not shown).

I machined the aluminum bits on a mini lathe.

Here are all of the bits and pieces ready to assemble.

I made the injectors plunger only have a single O-ring…

… but for the end cap I doubled up the o-ring for safety. I didn’t know how well these o-rings would work so I figured two o-rings on this end would be better. If the hot Plastisol shot past the plunger it would just go into the body but if it shoots past the end cap it might cause some harm so that’s why I choose to use two here.

On the back end cap I used a Delrin bushing to make the rod slide easier and to keep from getting scratched up during motion. The handle was just 3D printed.

I decided to also make a smaller (3-4 oz) injector for shooting single cavity test molds. Construction on this one was basically the same.

The o-rings worked perfect on the larger injector so I just used one for the end cap on this one. I did not use a lock on the end cap…

… so I made a snap on stop that clips onto the rod and it keeps me from pushing the end cap off accidentally.
So far both of these injectors are working great. I plan on making one more small one for doing duel injections.
March 12, 2020

Ctrl+C / Ctrl+V = Duel Mini Injectors. Well it wasn’t that easy but with a little more machining and some more 3D printed parts I’m almost ready to try two color baits.

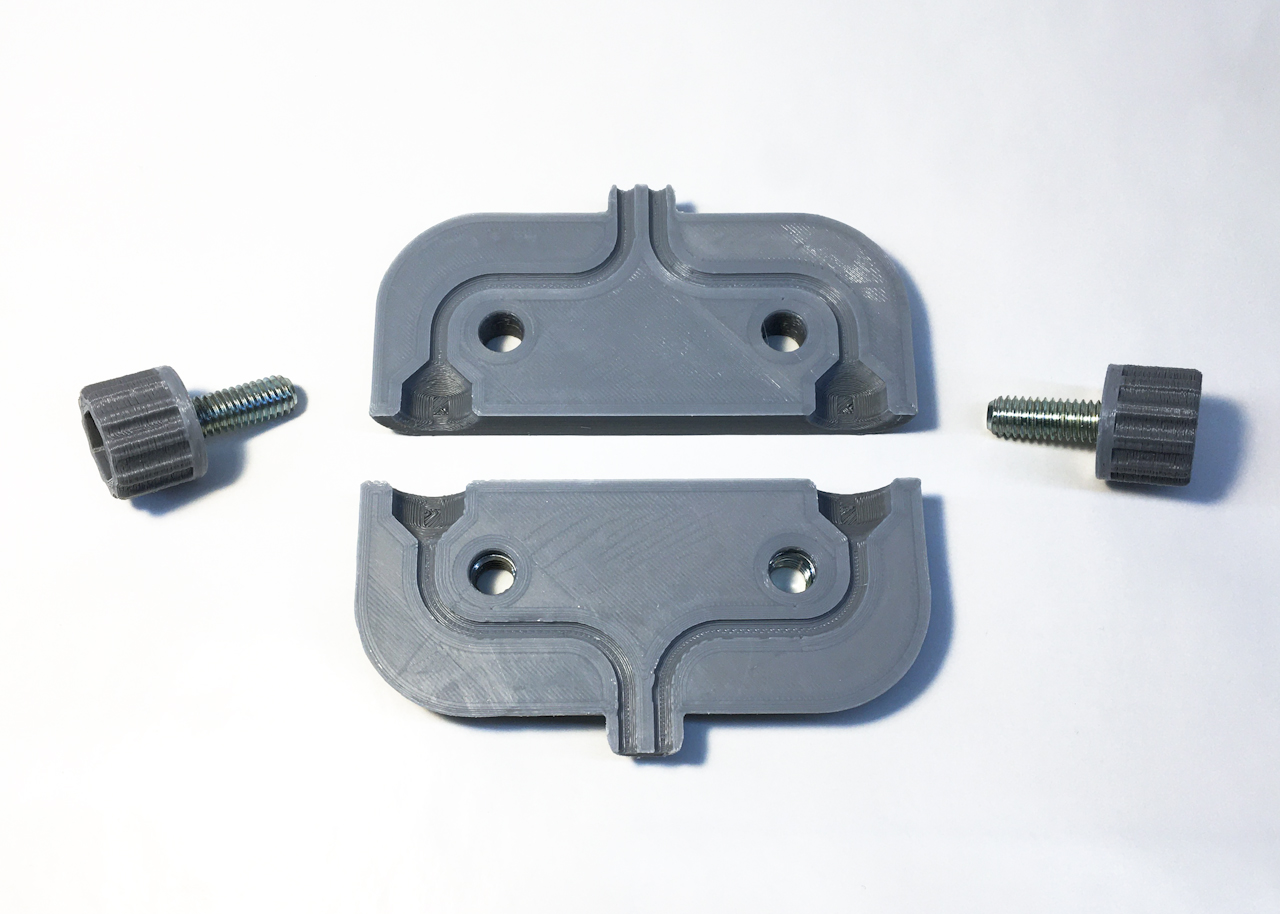
I tried to print a simple clamp but it didn’t hold well enough…

… so I did a quick redesign so the clamp encases the injectors better and re-printed everything. (I did have some print issues on the clamp but it will still work fine) I also designed a thumb knob and a dual handle.
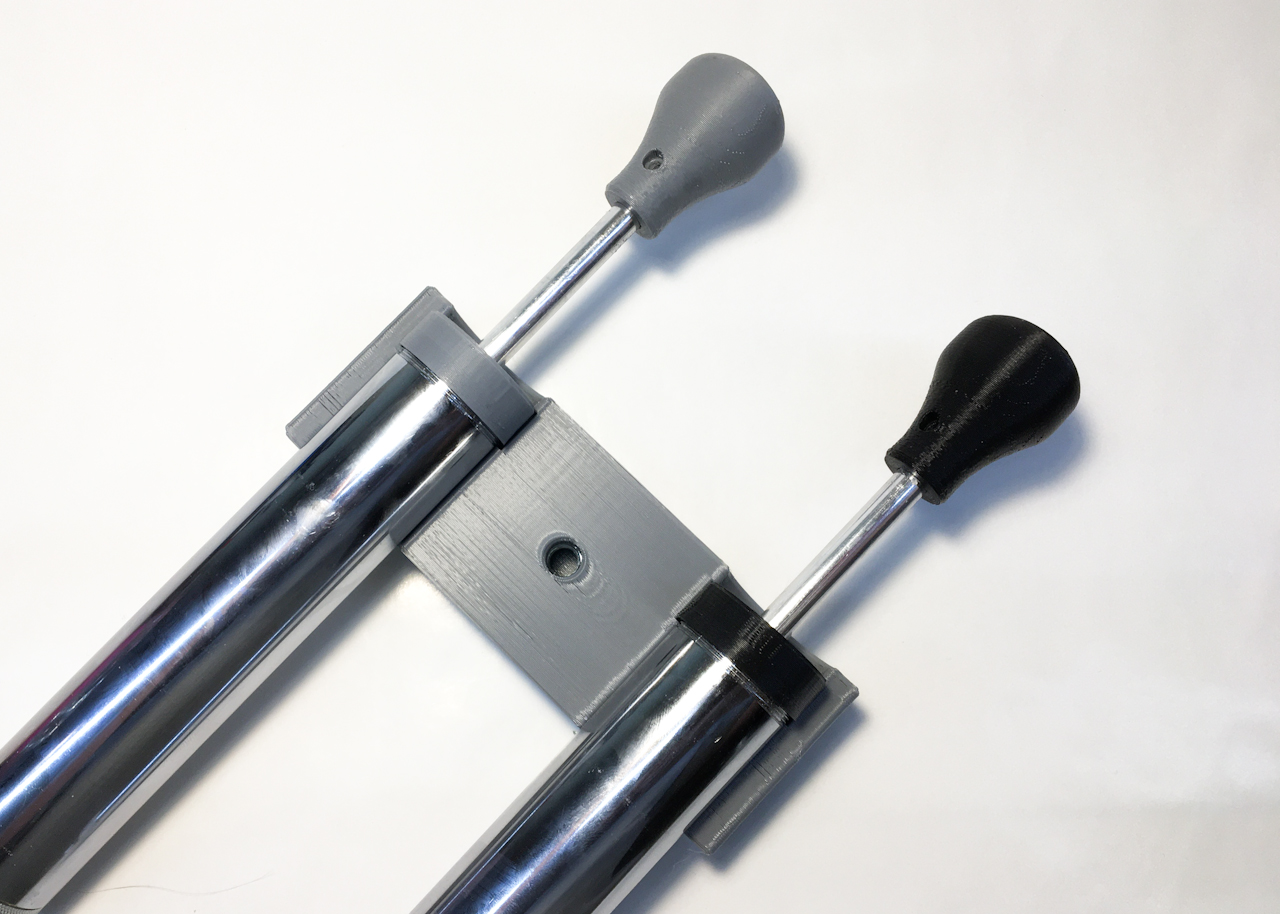
Here you can see how the clamp encases the rear caps of the injectors. This method should lock everything in place.

The quick release thumb screw was made from a simple bolt and nut combo that gets inserted into the print and the cap will just hold the nut in place.

The dual handle just bolts to the injector rods with the same 4-40 screws from the handles.
Here is the printed blending block. (We’ll have to see if this holds up over time.)

Again I just made a few quick release thumb screws.

Here are the injectors test fit into the blending block…

… and here is the completed setup ready to test out.

Here’s is the first duel shot of the four Tail Watermelon Grub.
May 7, 2020

This is one more larger injector that I made. This one is about 14 oz and was machined from a aluminum tube much like the store bought ones.
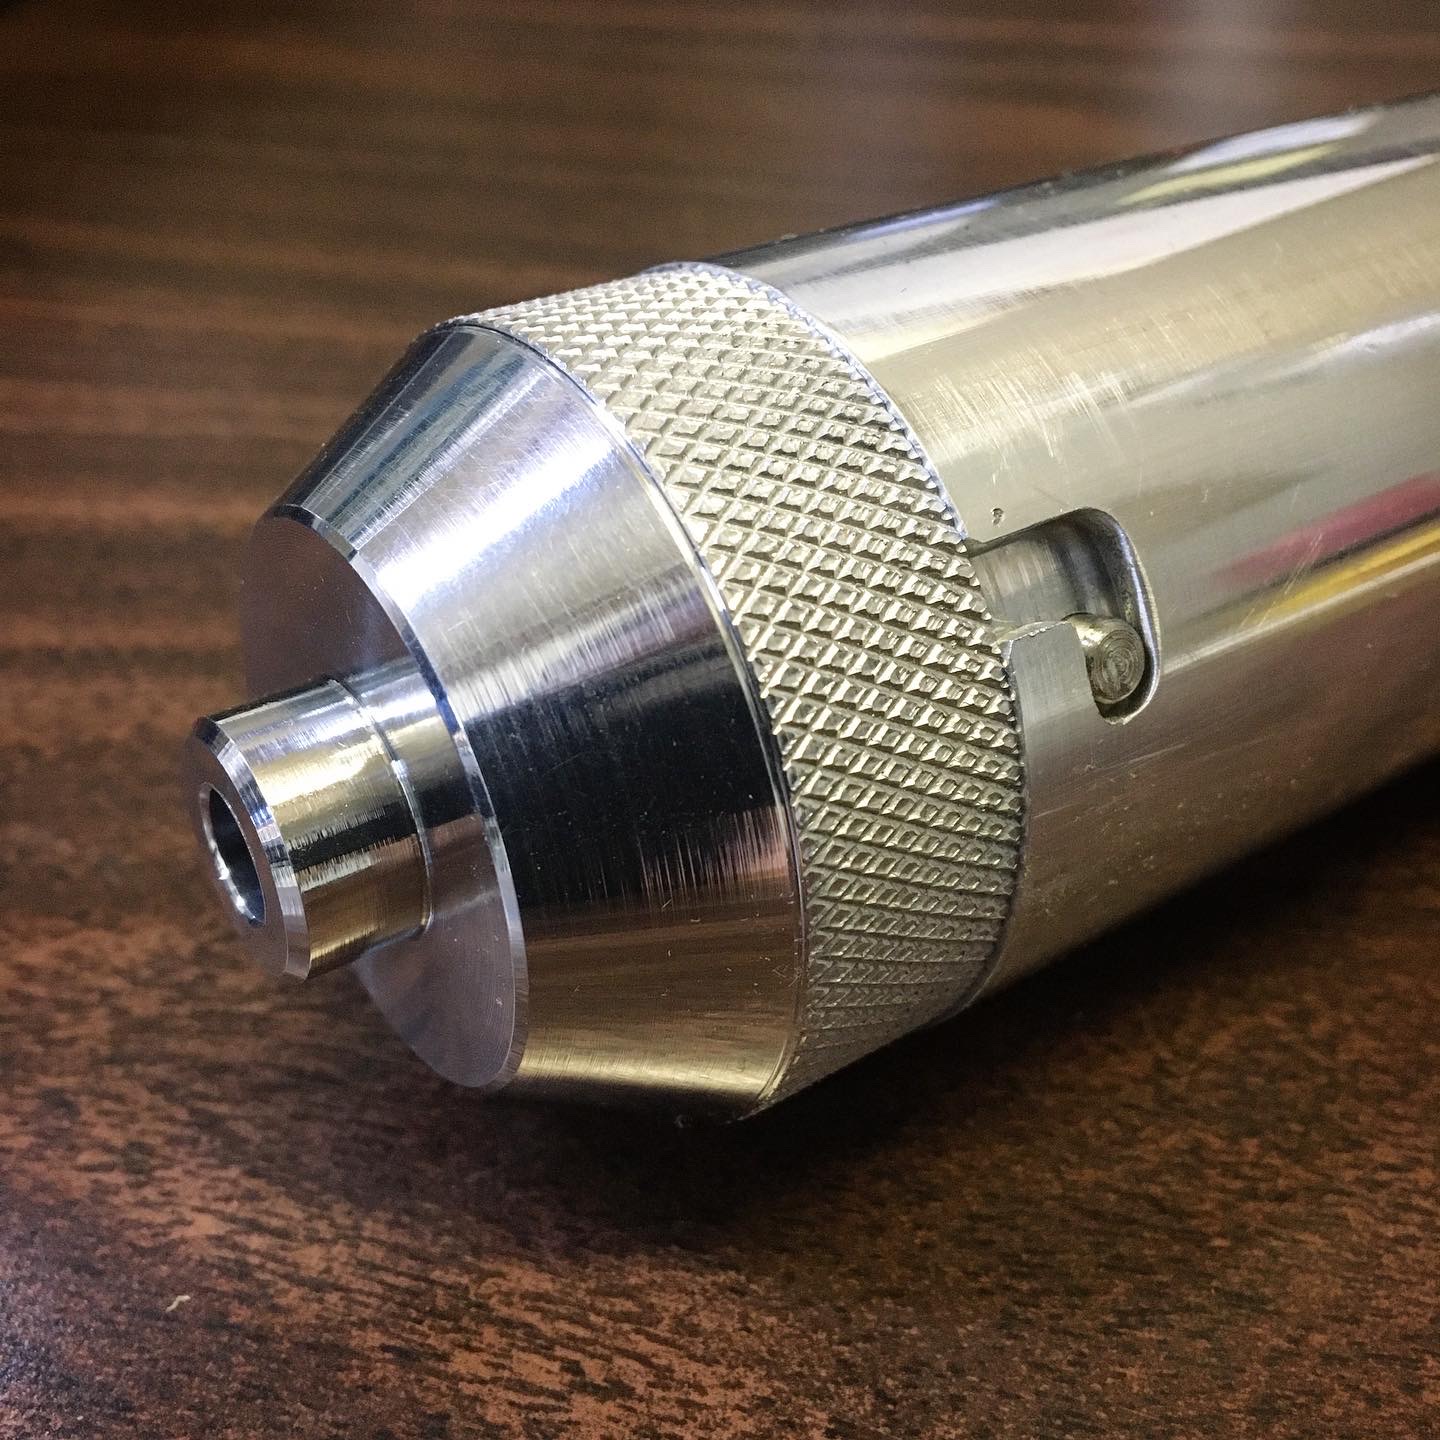
This one has a locking pin and I also added knurling to the front piece for a better grip for easy removal.

The end cap and handle were 3D printed and the end cap is mounted with a simple thumb screw so no tools are required during cleaning.

Here are the nozzle end, piston (or plunger), and rear end cap.

… and lastly all the parts of the disassembled injector. This should be the final addition to the injector family and should cover everything (and then some) I do with soft plastics.
All Information, Pictures, and Material is copyright © 2020 by Stephen Thone and may not be used for any personal or commercial purposes without the consent of the author. All rights reserved. The Author makes no guarantees or warranties as to the accuracy or completeness of, or results to be obtained from accessing and using the Information herein.